Guide by nekojoe
Mod Skeleton
To get started with making your first mod, navigate to the mods folder by hitting Win+R then typing:
%LOCALAPPDATA%\TotallyNotSeth\DnDGMod\mods
And create a new folder for you mod, named anything. For the purpose of this guide I’ll be naming my mod “mod guide”. Inside this folder, you’ll need a “mod.yaml” file, a folder called “res” (this is for any sprites), and a folder called “src” (this’ll be for your code). Depending on the content you would like to create with your mod, you will also want any of “cards.yaml”, “decks.yaml”, and “encounters.yaml”.
This is how my mod folder looks currently:
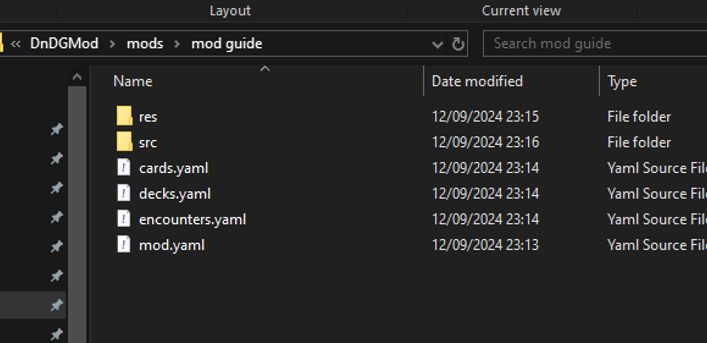
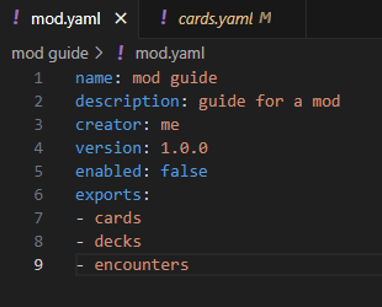
First and foremost, we want to set out the mod.yaml file correctly. This includes your mods name, description, creator, version, and exports. Another optional part of the mod.yaml is enabled. By choosing to include this parameter, it makes it very simple for yourself and others to enable and disabled your mod, but bear in mind this is fully optional, and the mod will function without this. Your mod may not include all of the same exports, but for demonstration purposes I’ll be including all the currently available exports.
Cards
Any unique cards you choose to make for your mod will need to be put inside the cards.yaml file. The first line in this file denotes the name of our card, as it appears in game. This is followed by a description, which generally includes information about what the card does. The {start_trigger} and {end_trigger} usually surround the part of the cards descriptions that says On play:. Any text contained within the start and end triggers will be colored blue, the image of this card in game will demonstrate. It’s also possible to display certain “keywords” in red, such as the word “exploit” in our cards descriptions.
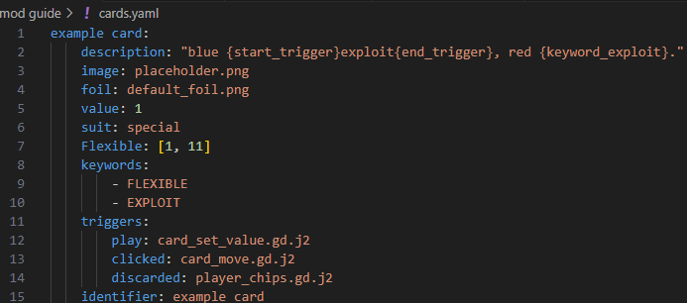
The image and foil values are paths to their respective files, and are found within the res folder we created earlier. Its important to make sure that the names of the files and paths match exactly. The images I am using are actually also the fallback options used when a path is not provided. This does mean that the image and foil paths are optional, and if not specified, your card will use the options shown below.
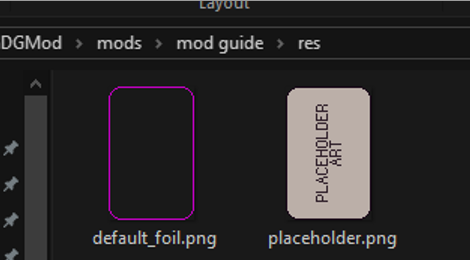
When creating your own card sprites, keep in mind that cards are 57x89 pixels in size, and extend to the very ends of the image. When creating a foil map for your card, the only valid colour you will able to use is pure magenta (HEX: #FF00FF). When using the foil map, the foil texture is applied to any pixels that the magenta pixels overlap on the original card sprites (images shown later). The next 2 arguments we pass into our card are value and suit, hopefully quite self explanatory. I believe the upper and lower limits to the cards value are 999 and -999. Valid suits include any of the standard 4 (spades, clubs, diamonds, hearts), as well as special (nothing suit) and all_suits_at_once (wildcards). Optionally, you can choose to make your cards flexible, such as Aces, or misprinted cards. There is no extra work needed for this to work, simple pass in the lower value, and upper value, but make sure to do it in that order, otherwise you will experience problems. The optional keywords correspond to the small bonus information boxes that appear when you hover over a card, and usually match any keywords present in the description. The most fundamental part to any interesting card, are the triggers. These are functions that are called whenever the corresponding in game action is performed. The card in the example has 3 triggers, which are denoted by the event, and the path to the file (found in our src folder from earlier) that contains the information about what to do when this event occurs.
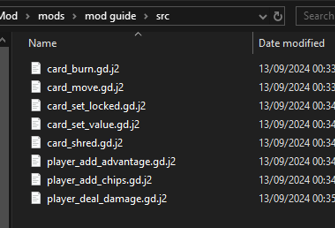
This is how the “src” folder in the guide mod looks, note the matching files linked to the triggers from the example code. This example mod will also be linked so you can have a look at the other functions I have included, but for now, the 3 in use are as follows:
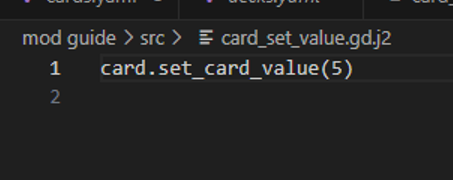
- When the card is played, its value will be set to 5. This is similar to how cards such as pi function in game, being set to 3 when played, and later determining if they should round up or not
- Next is the trigger for when the card is exploited, or “clicked”. In this case, the card will be moved to the other players side.

- Lastly, when the card is discard:

It will give 1 chip to the player who discarded it.
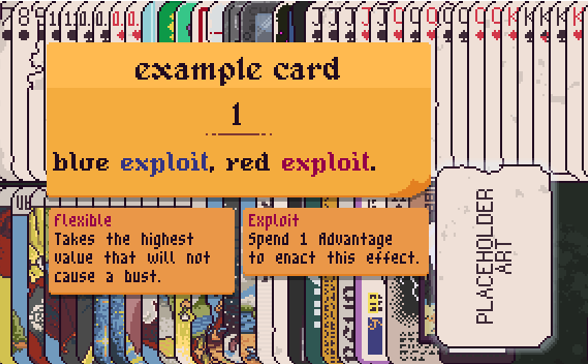
Here you can see the name, value, description, and keyword boxes, as well as the placeholder art we used
Writing your own functions
When creating your own function, by default, you will have variables for the current_player i.e. person who is playing the card, other_player the player who isn’t that one playing the card, and card which represents the card itself. When trying to create your own card functions, it can very useful to look through the games source code at any similar cards, to see how they achieve what they do, as well as looking at other peoples mods to see how they manage to make things works.